Sending a Message Immediately
A message can be sent from any of the messaging screens using the New button.
1. Select the Messages option from the menu bar.
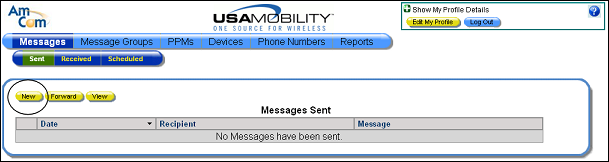
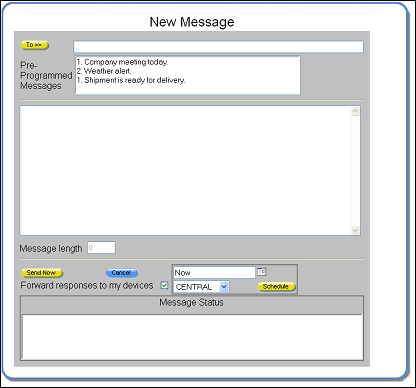
2. Click the New button. The New Message screen displays.
NOTE: A System Support user has extra capabilities when sending messages. Please refer to System Support Users Only: Sending a Message to All COG Managers for more information.
3. Click the To button to display the recipient selection screen.
4. A message can be sent to message groups, individual users, or both.
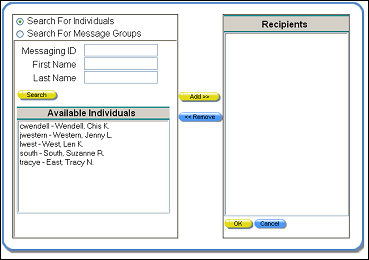
Choosing Individuals
A list of people in the company displays by default. You can either scroll through the list of people, or use the search feature.
a. Click on the Search For Individuals button
b. In the Messaging ID, First Name, or Last Name field, enter the search information. The wildcard feature can be used with a partial entry.
c. Click the Search button. The records that match the search string display in the Available Individuals window.
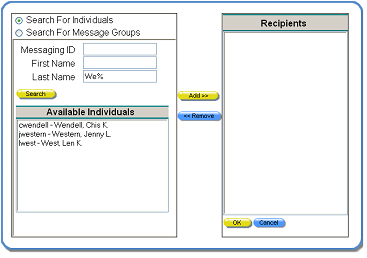
d. In the Available Individuals window, click on a name to select it.
e. Click the Add button to include the selected person in the list of recipients. The persons name is removed from the Available Individuals window and moved to the Recipients window.

f. Repeat the process to add more people.
g. To remove a recipient, click on a name in the Recipients window, then click the Remove button. The persons name is removed from the Recipients window and added to the Available Individuals window.
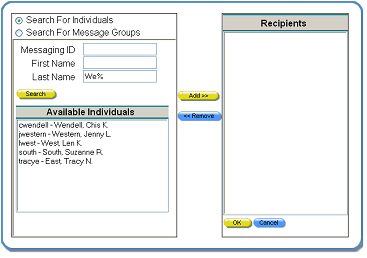
Choosing Message Groups
The message can also be sent to the individuals in a message group.
a. Click on the Search For Message Groups button.
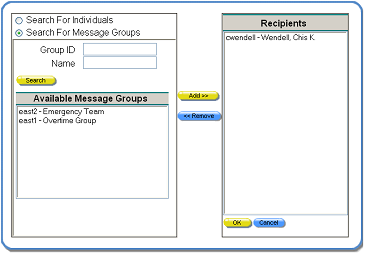
b. In the Group ID or Name fields, enter the search string for the message group. The wildcard feature can be used with a partial entry.

c. Click the Search button. The records that match the search string display in the Available Message Groups window.
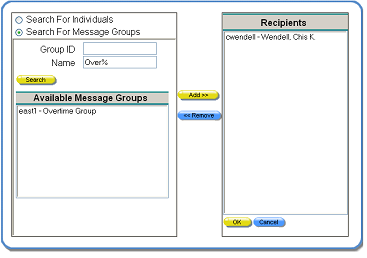
d. In the Available Message Groups window, click on a name to select it.
e. Click the Add button to include the selected message group in the list of recipients. The message group name is removed from the list in the Available Message Groups window and placed in the Recipients window.
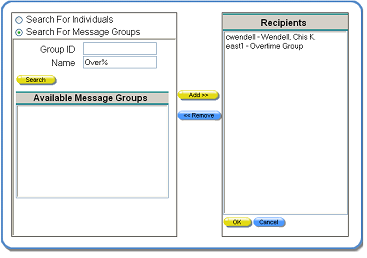
f. Repeat the process to add more message groups.
g. To remove a recipient, click on a name in the Recipients window, then click the Remove button. The message group is removed from the Recipients window and added to the Available Message Groups window.
5. Click the OK button to save the recipient selections. The New Message screen re-displays, showing the selected recipients in the To field.
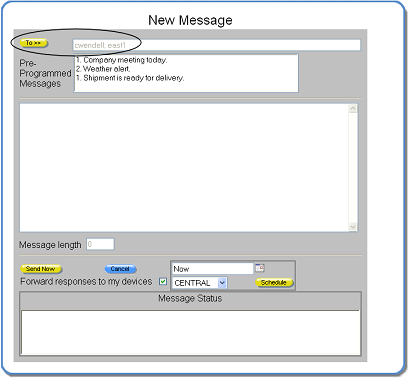
6. Enter the text of the message in the message window. A user can enter text manually, choose a pre-programmed message (PPM), or do both. When text is entered manually and a PPM is selected, the PPM is inserted after the manually entered message.
Both company and personal PPMs are listed in the Pre-Programmed Messages window. The company PPMs are the top of the list. Double-click on a PPM to select it. More than one can be selected.
The length of the message, measured by number of characters, displays in the Message Length window.

7. Click the Send Now button to send the message immediately. The New Message screen closes automatically, unless there is an error sending the message. The error displays in the Message Status window, and the screen can be closed by clicking the X button.
8. To confirm that the message was sent, choose the Sent option from the Messages option to review the Sent screen. The sent message is included in the list of messages.