Forwarding a Message
A user can forward either a received message or a previously sent message to another person or to a message group.
When a message group is selected, the message is sent to each member of the group. An individual user that has been selected as a recipient and is also a member of a selected message group receives the message only once. A forwarded message can have up to 30 recipients.
A green and white plus sign icon displays next to a message that is too long to display completely in the Received screen. Click the icon to display the entire message in a new message box.
A message can be forwarded only if the user is assigned the SEND/RECEIVE or SEND ONLY messaging types. If the user is not able to forward a message, the Forward button is not available in the screens.
NOTE: A System Support user has extra capabilities when forwarding messages, and is able to forward a message to all COG managers in every customer COG. Please refer to System Support Users Only: Sending a Message to All COG Managers for more information.
1. Select either the Sent or the Received option from the Messages option in the menu bar. The Sent or Received screen displays.
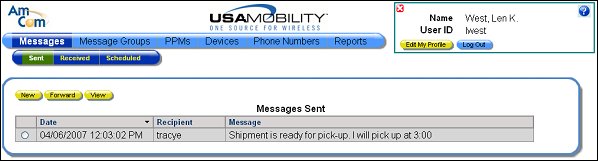
2. Click on the radio button next to the message you want to forward.
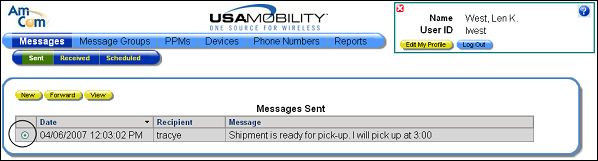
3. Click the Forward button. The Forward Message screen displays.
NOTE: The Forward button is not available if a user is assigned the RECEIVE ONLY message type.
NOTE: A System Support user has extra capabilities when forwarding messages, and is able to forward a message to all COG managers in every customer COG. Please refer to System Support Users Only: Sending a Message to All COG Managers for more information.
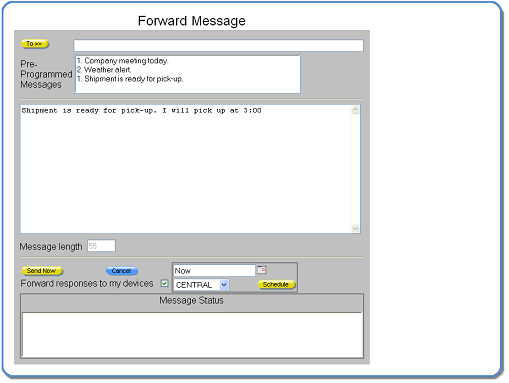
4. Click the To button to select the message recipient(s). A message can be sent to message groups, individual people, or both.
Choosing Individuals
A list of people in the company displays by default. You can either scroll through the list of people, or use the search feature.
a. Click on the Search For Individuals button.
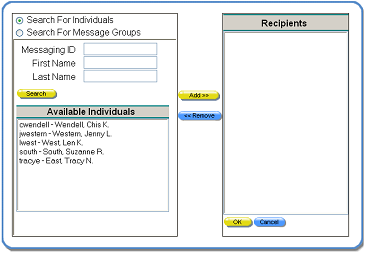
b. In the Messaging ID, First Name, or Last Name field, enter the search information. The wildcard feature can be used with a partial entry.
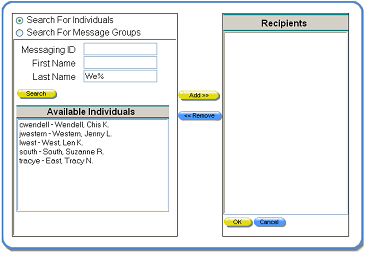
c. Click the Search button. The records that match the search string display in the Available Individuals window.

d. In the Available Individuals window, click on a name to select it.
e. Click the Add button to include the selected person in the list of recipients. The persons name is removed from the Available Individuals window and placed in the Recipients window.
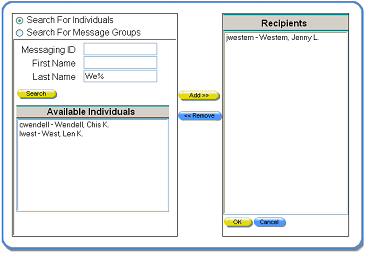
f. Repeat the process to add more people.
g. To remove a recipient, click on a name in the Recipients window, then click the Remove button. The persons name is removed from the Recipients window and added to the Available Individuals window.
Choosing Message Groups
The message can also be sent to the individuals in a message group.
a. Click on the Search For Message Groups button.

b. In the Group ID or Name fields, enter the search string for the message group. The wildcard feature can be used with a partial entry.
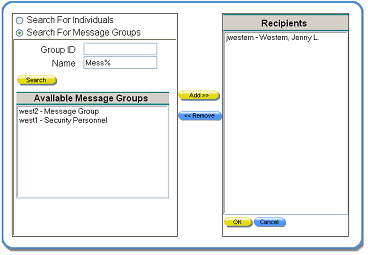
c. Click the Search button. The records that match the search string display in the Available Message Groups window.
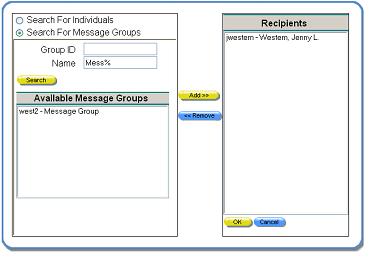
d. In the Available Message Groups window, click on a name to select it.
e. Click the Add button to include the selected message group in the list of recipients. The message group name is removed from the Available Message Groups window and placed in the Recipients window.

f. Repeat the process to add more message groups.
g. To remove a recipient, click on a name in the Recipients window, then click the Remove button. The name is removed from the Recipients window and added to the Available Message Groups window.
5. Click the OK button to save the recipient selections. The Forward Message screen redisplays, showing the selected recipients in the To field.
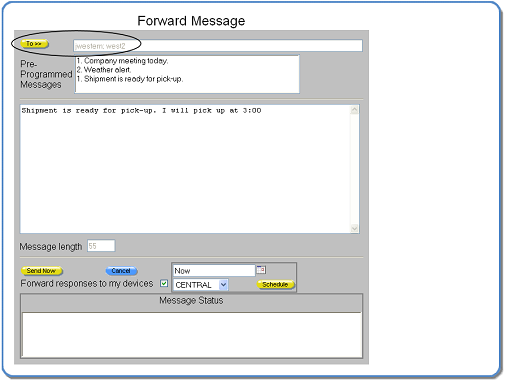
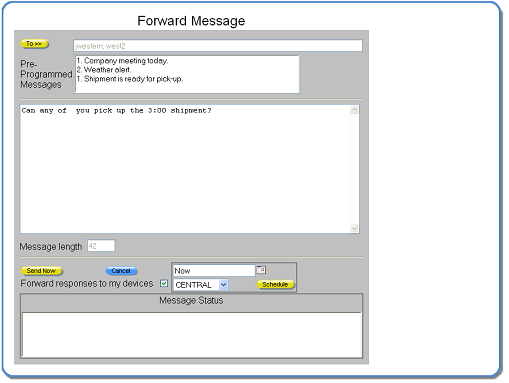
6. Enter the message to be forwarded in the message window. A user can enter text manually, choose a pre-programmed message (PPM), or do both. When text is entered manually and a PPM is selected, the PPM is inserted before the manually entered message.
The original message can be deleted by highlighting the message and pressing <Delete>. Deleting the original message is optional.
Both company and personal PPMs are listed in the Pre-Programmed Messages window. The company PPMs are the top of the list. Double-click on a PPM to select it. More than one can be selected.
The length of the message, measured by number of characters, displays in the Message Length window.
7. The message can be sent immediately by clicking the Send Now button, or it can be scheduled for delivery at a future date and time.
a. Click the calendar icon next to the date field to display a calendar.

b. Choose a year by clicking the left and right arrow buttons.
c. Choose a month from the drop-down month list box.
d. In the time fields, enter the time the message should be sent.
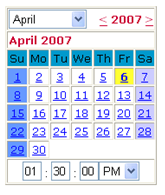
e. In the calendar, click on a day. When you click on the day, the calendar automatically closes, and the date and time information displays in the Forward Message screen. The date and time can be adjusted in the Forward Message screen.
f. The Forward Message screen displays. The date and time can be changed by typing over the entry.
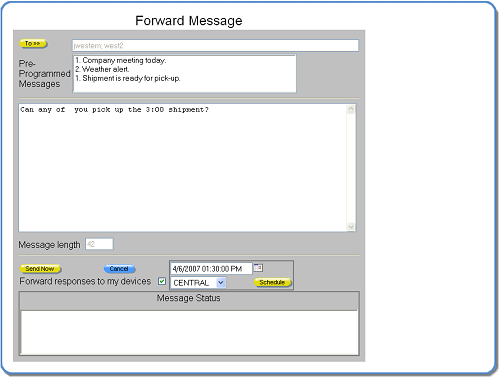
g. The time zone can be changed by choosing a new time zone from the list box.
h. Click the Schedule button.

8. When the message is forwarded, a message status displays in the Message Status window and the window closes automatically.